Your SalonIQ appointment book holds a whole host of vital information for you and your business and can also be full of colours & symbols that are all there to help make your life easier. This guide will take you on a journey through your appointment book explaining the key areas and how it can help you on a daily basis.
Your appointment book:
Your SalonIQ appointment book works in the same way as you are probably used to, you will see the dates for the current week across the top, below this will be your bookable team members & their columns. The time blocks run down the left-hand side & you will have your appointment slots in grid form. These block & slot times are customisable in Menu > Settings > Salons > appointments to suit your business set-up.
Use the left or right arrows to move forward / backwards and if you want to get back to the current day quickly, simply click the circle icon. 
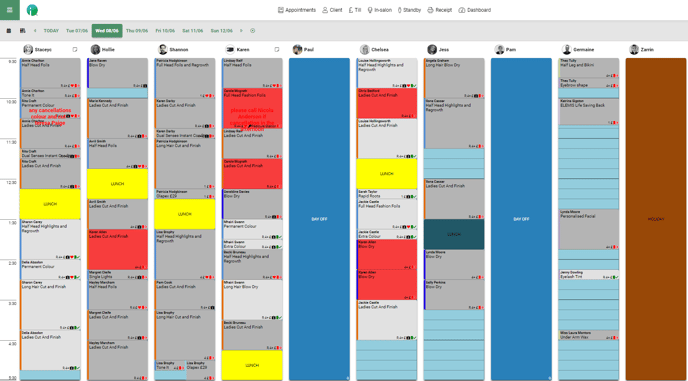
Below is a screenshot of how your appointment book may look;
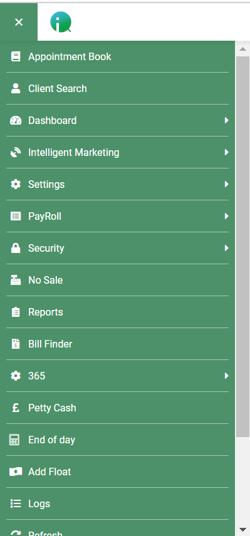
Navigation - Starting from the top left corner of your page, you will see 3 horizontal lines, this is your Menu icon. Select this icon to navigate to all areas of your SalonIQ system.
Moving along the top to the right you will notice some buttons to help with quick access these buttons will remain seen no matter what SalonIQ page you are viewing:
Appointments - This will take you to your appointment book page.
Client - This will bring up your client search window.
Till—Do you have a client who wishes to make a purchase without an appointment? No problem. Click here to show your till screen.
In-Salon—Select this screen to view all clients currently checked in and in your salon. From here, you can check a client out when they are ready to pay, view client record cards, edit a client's bill, view their current receipt, or group bills together for families wishing to pay together.
Waiting list—If you run a busy salon and clients wish to be added to your waitlist, or if you are a walk-in salon only, you can add clients here. The system will message your clients when you have a free appointment.
Receipt - From this page, you can edit, re-print or email your last bill to a client.
Sundries - If you offer a refreshments service for your clients, you can add sundries orders for your clients and add any charges to the client's bill.
Dashboard - Here is your appointment dashboard, use these areas to help aid you with everything from your SMS message centre to skin tests due and tracking your consultation forms.
Moving on, you will then see the current time displayed in a digital format.
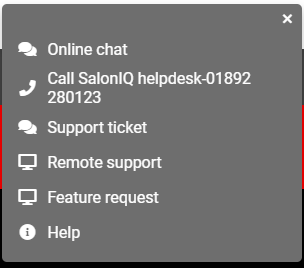
Next to the time, you will see an? icon, if you select the icon you will have a small help menu with ways to contact our support team, add a feature request for something you would like to see in SalonIQ or to view our extensive library of FAQ's (just like this one).
Your next icon is a bell symbol, selecting this icon will give you your current notifications from SalonIQ, which will include important notices, links to our recent marketing material and much more, we advise you to check here regularly to keep up to date.
Finally, you have your last navigation button, here you will see your system name, click on your name to view the following details:
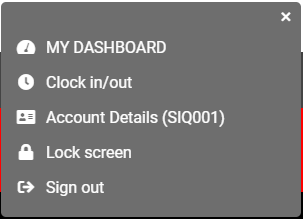
Bookouts
Bookouts are likely to be used and appear on a daily basis. You can add a book out for multiple reasons to cover lunches, sickness, holiday, meetings and days off.
To add a bookout select a free time slot in a team members column and select add bookout.
Enter the details of your bookout and then Save

Please also see: How to add lunches into SalonIQ
Appointment service colours - when you set up or add services in Menu > Settings > Services > Add New Service, you can pick an appointment colour, this colour will show in your appointment book and can help group types of services together so they are easy to see on the appointment page for example, you may wish to simply set all colour services to be red and your styling services to purple, or you could break this down even further to colour code your appointments.
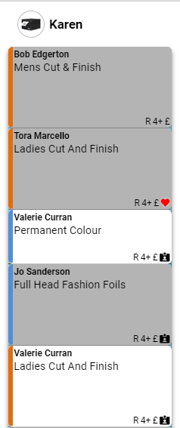
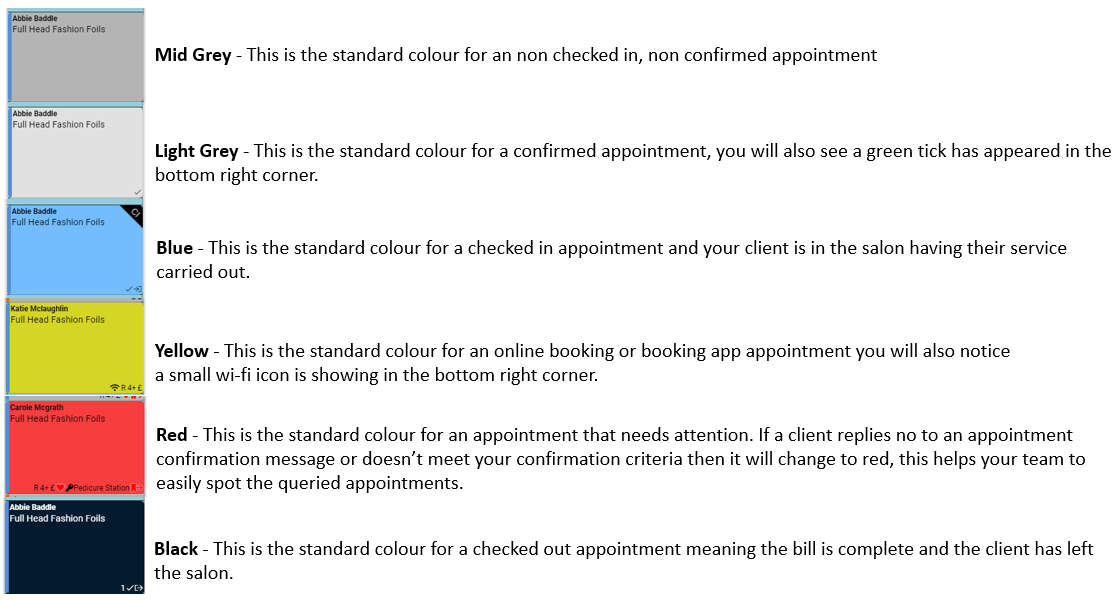
Appointment colours - in your diary, you will see 6 main colours used these are mid grey, light grey, black, light blue, yellow and red. Here is what each one means:
Appointment Icons
Sometimes you will see large icons and sometimes you will see one or more smaller icons on your client's appointments, here we will explain what each one means.
Larger icons:
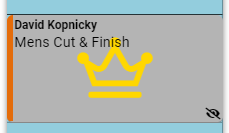
New Client - you will see a yellow crown icon on all new client appointments. This icon will no longer show once a new client's first appointment has been checked out.
A fantastic way to spot your new clients easily and treat them like royalty.
Small Icons:
R = Request booking - the client has asked specifically for the team member
= Online/booking app booking
![]() = Membership - a client is part of a salon membership scheme
= Membership - a client is part of a salon membership scheme
![]() = New client
= New client
 = Client has confirmed their appointment via SMS message
 = A team member has manually marked the client as confirmed
 = Your client's birthday is this month
 = The client has been sent an SMS reminder but has not yet replied
 = Client has a promotion on their bill
! = Client's skin test date has lapsed/does not have a completed skin test in SalonIQ
4+ = The client has been to the salon more than 4 times so is classed as a regular client
£ = Client has paid a deposit / has money on their account, the amount paid will also show here
Use your appointment dashboard daily for insights into your SMS message centre, booking conflicts, deposits & much more! Appointment Dashboard
For any questions regarding the Appointment Book please email help@saloniq.com or call 01892 280123 opt. 1