Log out of SalonIQ and select Printer in the top left corner
Click on Setup Receipt Printer
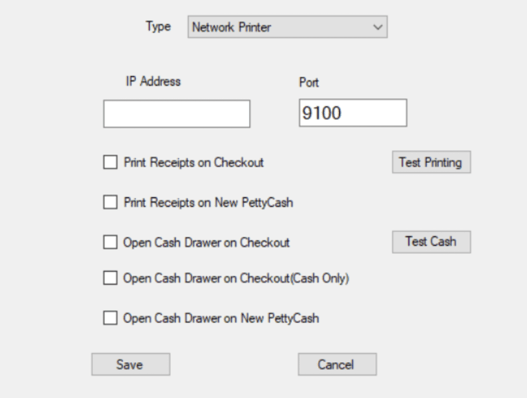
First, select whether your Receipt Printer is connected to your computer via USB (directly to the computer) or Network (connected via an IP Address).
For a USB printer click on the Select Printer button and then choose your Receipt Printer from the list, these will either be named with the receipt printer make, e.g. Star, Epson, or will be named THERMAL Receipt Printer. Check that the Status of these says Ready when you select them and then click Apply (if available) then Print.
For a Network Printer, add in the IP Address for your Receipt Printer (this will be in the form 192.168.?.???) and ensure that the Port number is set as 9100.

You can then check your Printer is working by clicking Test Print and this should give a test printout from the Receipt Printer.
You then have several options to choose on how you wish the Receipt Printer to function, these are explained below:
Print Receipts on Checkout - This will print a receipt automatically after each transaction
Print Receipts on New Petty Cash - Automatically prints all receipts for petty cash
Open Cash Draw on Checkout - Opens the cash draw automatically after each transaction
Open Cash Draw on Checkout (Cash Only) - The till will only open automatically if you are taking a cash payment
Open Cash Draw on New Petty Cash - Opens the cash draw automatically when using Petty Cash