Appointment screen > Add Appointment > Select Client > Select Service > Save
- To make a New Appointment, you must first select the date on which the client would like to book, you can do this by using the large calendar on the left of the screen or the days or weeks using the arrows

- By using your mouse cursor, click on the time in which your client would like to book and select Add Appointment
.png?width=655&height=368&name=Screenshot%20(3).png)
- Now search for the client in the Client Search screen

- Now select the service or services, categories are displayed on the left of the screen. At the top right corner is a service search box

If you need to book multiple services, select the Add To Basket option located below each service, you can add limitless services this way
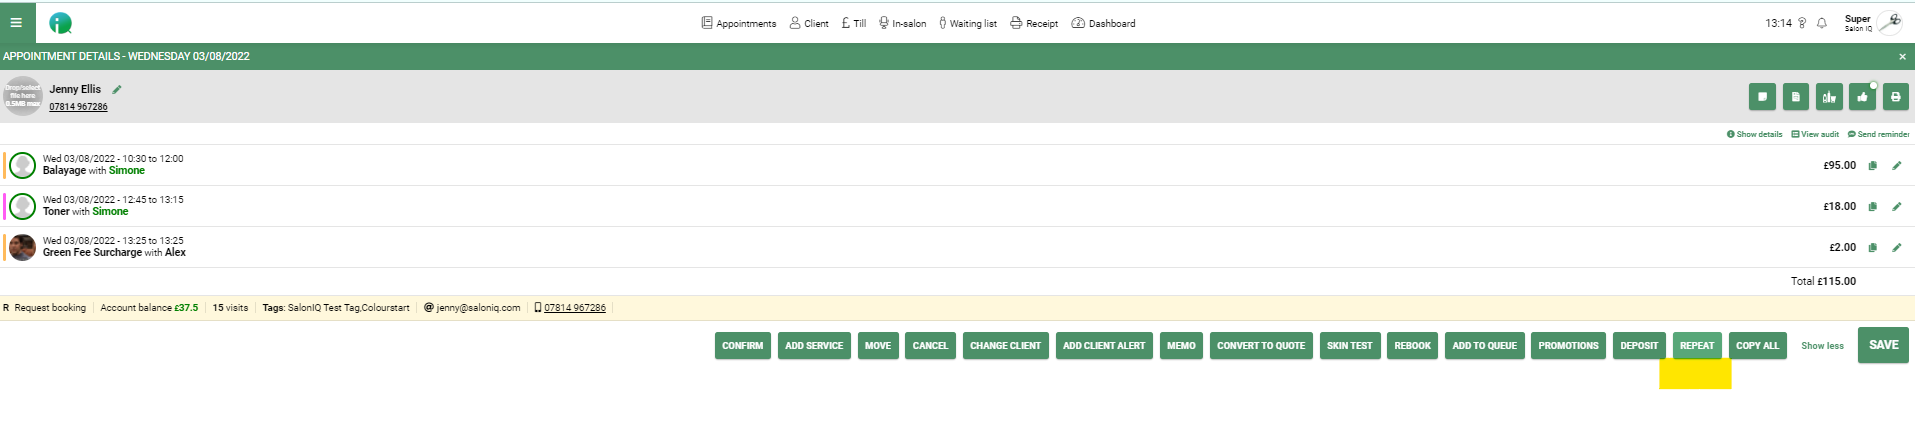
- Change Client - Change the name of the client booking the appointment
- Add Client Alert - Add an alert to the client card, for example, LONG HAIR EXTRA 15 MINS REQ
- Memo - Some salons use this to note clients' favourite beverage for example
- Skin Test - Record the date on which your client last had a Skin Test
- Add Service - Allows you to add additional services, Treatment for example
- Promotions - This allows the User to add promotions if active to the service

- Once ready, click on Save

- This will now add the appointment to your SalonIQ
Please note SalonIQ will place a golden crown on New Client Appointments, this is to help you identify New Clients
How to repeat an appointment
If you would like to repeat an appointment for a regular client then this is quick and easy to do in SalonIQ.
Follow the steps above to book your initial appointment.
Select the appointment again in the diary, click on the "Show More" button & select "Repeat"
Here you will see the options for the repeat:
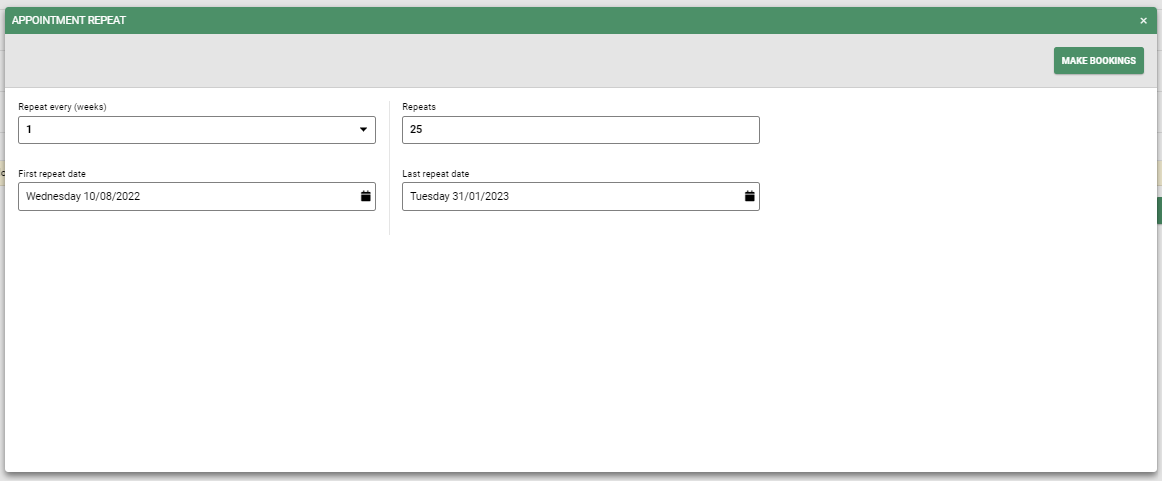
- Select to repeat every x number of weeks depending on the client's needs
- Select the first date to repeat (this should pre-populate from the current date along with the number of weeks to repeat)
- Enter either the number of repeats to create or the Last repeat date.
- Once you are happy with the criteria, select the "Make Bookings" button.
A prompt box will open to ask you to confirm your repeat schedule

Select YES to confirm or NO to return to edit the settings.
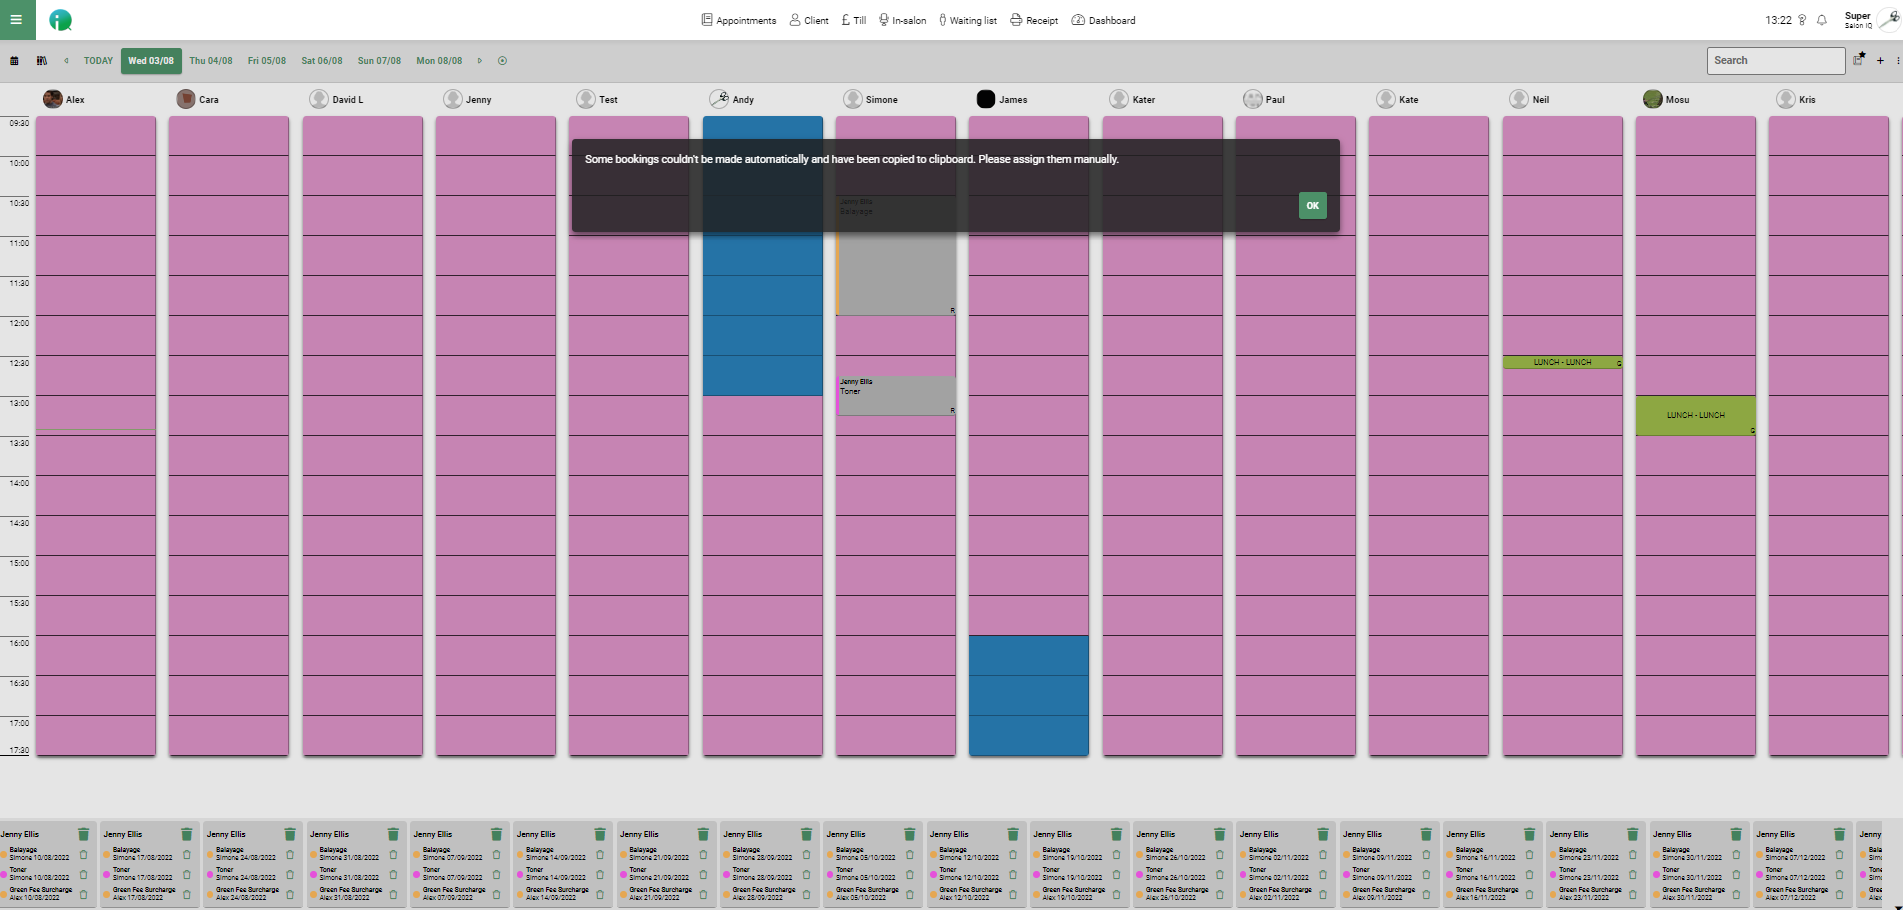
Your bookings will now be populated in your diary.
If there are any dates in the future that cant be booked automatically due to no availability, these future dates will populate in your appointment book clipboard to be manually dragged to the correct or an alternative time or date.
How to Move an appointment
If you need to move an appointment to a new day or time you can do so easily without the need to cancel.
Firstly, go to the appointment you wish to move, if your appointment is staying on the same day but just to an earlier or later time or a different team member you can simply click and hold your cursor or finger and drag the appointment to the new time or team member.
Alternatively, select the appointment to open the details box

Select Show More & "Move" from the button choices below

You will then see your appointment in the bottom right corner of your appointment page.

Select the new date from the appointment book menu bar and drag your appointment from the corner to the team member & time you need.
Once you let go and drop the appointment into its new time, it will flash red until it has been saved into place.