How to create and send a blast email
This article will guide you through how to create an email in Email Manager and view the cost of sending an email.
Email manager is a third party company who we have partnered with to manage the Email blasts that you send to your clients.
There have been some fantastic results producing a high return on investment.
To view different pricing plans, please click here
To view email statistics, please click here
To find out how to design an email, please click here
To view how to use templates, please click here
Features of Email Manager
There are so many ways to improve your e-blasts, from writing a clear message, adding eye catching imagery, animated GIF's and giving a call to action.
- Add GIF's
How to access Email Manager
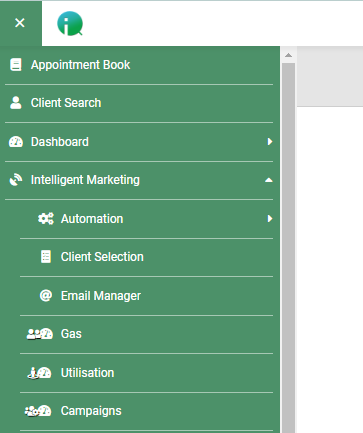
You can access Email Manager from SalonIQ, go to Menu > Intelligent Marketing > Email Manager.
Creating a new campaign
To begin your new e-blast, access Email Manager and the click on Create > Campaign.
Enter the Name of your campaign - only you will see this not your clients

Now you are ready to enter a few more details about your e-blast.
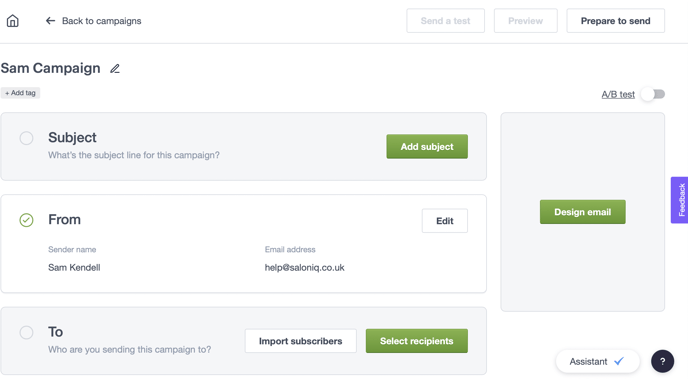
Subject - This is one of the most important aspects of your e-blast and is what is going to tempt your clients to open it from their inbox and see what you have to say.
From - This is who the email will be from when you clients view it in their inbox
To - Who are you sending the e-blast to? You can either import subscribers or select recipients from an already imported list.
You can create your client list in SalonIQ by going to Menu > Intelligent marketing > Client selections > use the relevant filters to narrow down your target clients > ensure you have the Type set to Email > Save & Get Client Count > View Clients > Email Blast.
As soon as you clients to Email blast the list will import automatically over to Email Manager
Design Email - You are now ready to design your email
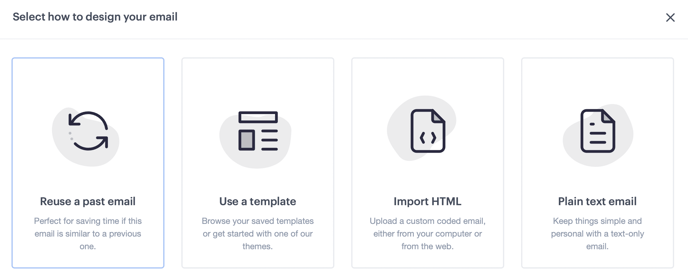
There are four ways you can create the look and feel of your email, use a past email, use a template, import html or use the plain text email.
The most common are the first two, Reuse a past email or Use a template.
Having a short bold title and a header image at the very top of your email is great to grab your clients attention straight away.
Try and avoid adding lengthy amount of text, this can be quite off putting for clients which will tempt them to close your email seconds after opening it.
Instead break up the text with short paragraphs or bullet points, even add images between your text to keep it engaging and eye catching.
Below you can see an example of an email from a salon group, at the very top of this email example we have a striking image, a call to action, followed by a summary of the email.
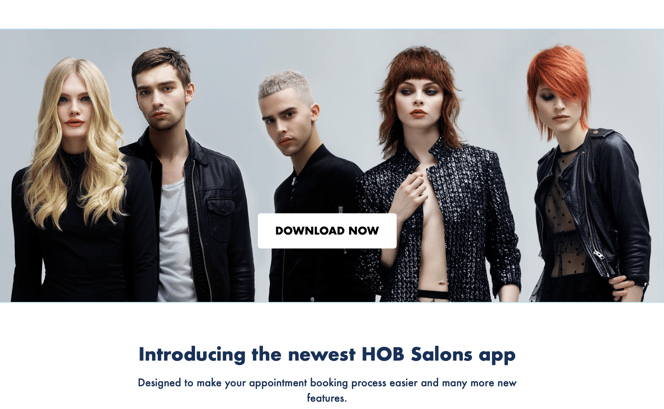
Call to action - otherwise known as CTA's, a call to action is so important when it comes to marketing, it is a couple of words telling your clients what to do. For example;
- Call now to book 01234 567890
- Email us with your questions help@saloniq.com
- Download now (attach the download link to the button)
- Book your appointment (attach your booking widget link to the button)
- Learn more
- Find out more here
- Buy Now
Building your email
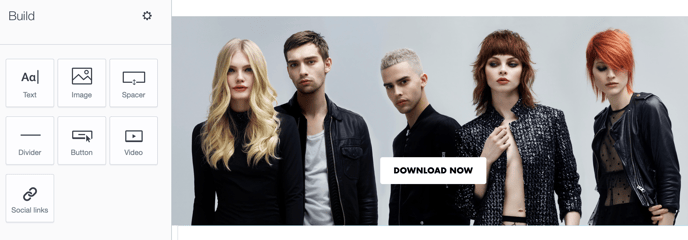
Within your email template you will see on the left hand side a number of different elements that you can use to make your email more engaging.
- Add text
- Add an image
Email Manager currently supports images with dimensions of up to 3500x3500 pixel dimension
- Add a spacer
- Add a divider
- Add a button
- Add a video
- Add social links
You can move each of these elements around within your email to make it look attractive.
Adding a new section
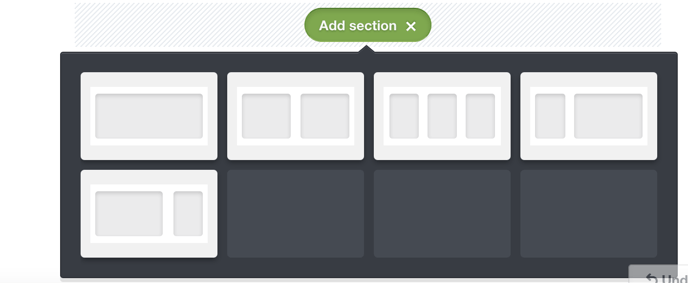
Why not change the layout by adding a new section anywhere through out your email template. To do this scroll to the very bottom of your email templet and click on Add section.
You are able to add text, images, animated GIF's and video whiting these sections.
Sending your email
Preview - in the top right hand corner of your email template you have three option,
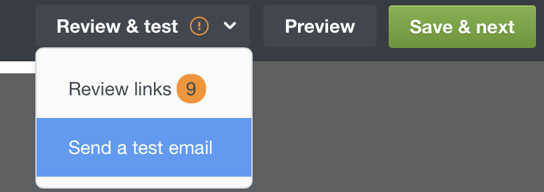
- Review and test
- Preview
- Save and Next
Preview is a great one to try as you will be able to see how the email looks on a computer and mobile device.
When you are happy with your design you are now ready to send it, however before you do this it is always advisable to send your self a test email first. This will allow you to view any mistakes, you can send it to someone to proof read and correct any typo's.
Send a test email
To do this go Review and test > Send a test email
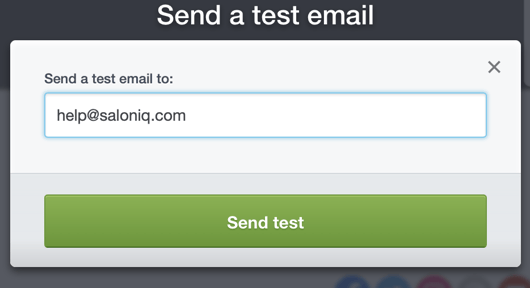
Enter the email address you would like to send the test to, see image below
When you are happy with the content you can now send the email to your client list, click on Save & Next > Prepare to send. This will show you a new pop up window giving you a couple of options.
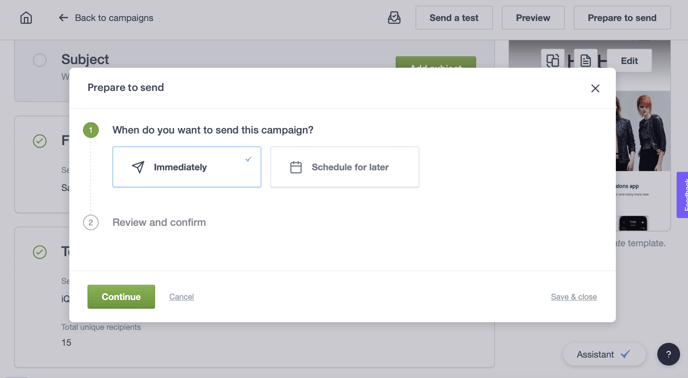
The options are;
- Send Immediately - when selecting Immediately > Continue > your email will go straight away
- Schedule for later - select schedule for later will allow you to select a date and time to send, great for getting hard with your marketing and being organised.
Email results
A very important area to look at once your email has been sent are the results, how did the email perform? How many bookings did you receive from the email?
You are able to view the e-blasts statistics from Email manager, plus view the ROI within SalonIQ through the integration.
To view the results of a sent campaign in email manager go to Campaigns > Snapshot > from here there are several statistics you can view
Open and Clicks


Aim to have a 30-40% open rate when sending an e-blast, an enticing subject line will help you with this followed by a a strong CTA (call to action) within the email to get your clients to act.
Templates for Email Manager
Within your email manager account you have the ability to access a variety of templates that are available for you to use as and when you would like. You can always tweak, add your salon logo and images etc. or simply send as they are.
From your SalonIQ system go to Menu > Intelligent Marketing > Email Manager > Once you are logged in select My Templates and here you will find a selection created by SalonIQ as well as seasonal templates from our retail product partners.
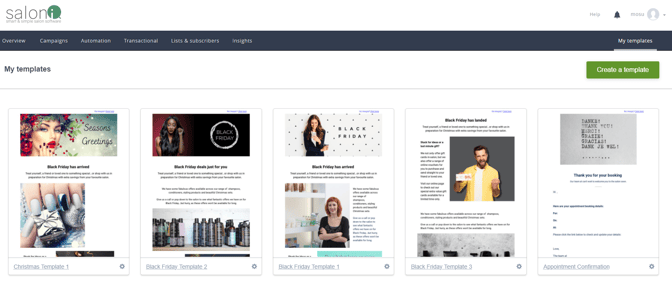
Once you have chosen the template you would like to use for your E-Blast select the settings cog and choose "create campaign"
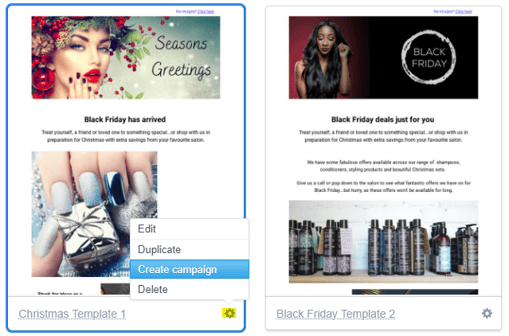
Next, give your campaign a name - for example Black Friday 2023.
Now you are ready to tweak, personalise and edit the template content. This is done by clicking in the area you wish to edit and using the menu options to the left of your screen.
Don't forget - If you are using a template that displays a button, for example a book now button you will need to add your own personalised links to make them clickable for your clients.
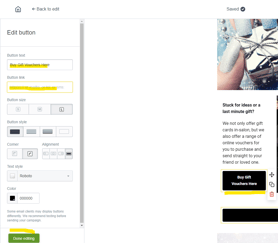
Simply click on the button to activate the menu on the left of your screen and paste or type your link address, once you are finished, select Done Editing.
Also don't for get to add links to your social media and website to encourage client interaction.
Pricing for Email Manager
.png?width=688&height=860&name=Email%20Manager%20Price%20List%20(1).png)
If you would like to move from the typical pricing structure to a monthly payment plan please reach out to our support team as we will need to action this for you our end. You can call 01892 280 123 opt.1 or email help@saloniq.com
![SALONIQ_Logo-High-Res_darkbg (1) (1).png]](https://faq.saloniq.com/hs-fs/hubfs/SALONIQ_Logo-High-Res_darkbg%20(1)%20(1).png?width=141&height=79&name=SALONIQ_Logo-High-Res_darkbg%20(1)%20(1).png)