This article will take you step by step through the process of setting up appointment confirmations by email or SMS.
From your current SalonIQ screen go to Menu > Intelligent Marketing > Automation > Custom as a default you will be shown the SMS messages. You can use the drop-down menu on the top right of this page to switch to view Email messages.

How to set up an SMS confirmation message
How to set up an email confirmation message
How to set up an SMS appointment confirmation message
In the SMS message list you will see a message titled Appointment Confirmation By SMS, it will be red if it isn't active.
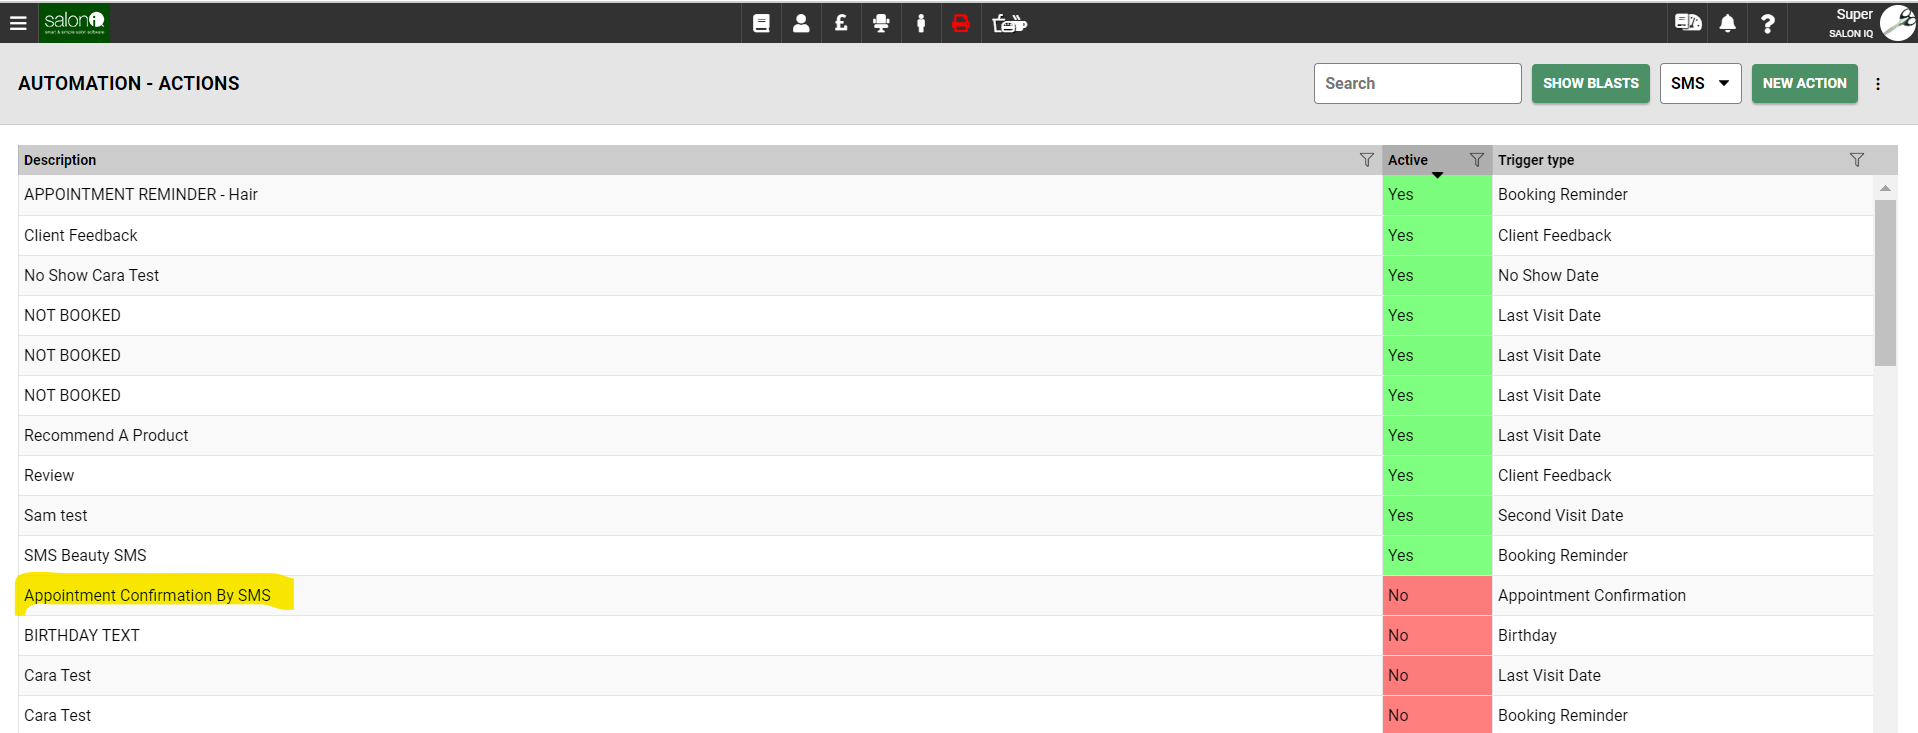
Click on the Appointment Confirmation By SMS name to open up the settings screen.
Once you have the details screen open you can create your message.
Firstly, you will see the top section has some pre-filled fields, please double check that they match the below:
Description - Appointment Confirmation By SMS
Action Type - SMS
Trigger - Appointment confirmation
There will be an example message already pre-filled for you so you can keep this option, make tweaks or delete the wording & re-create your own message from scratch.
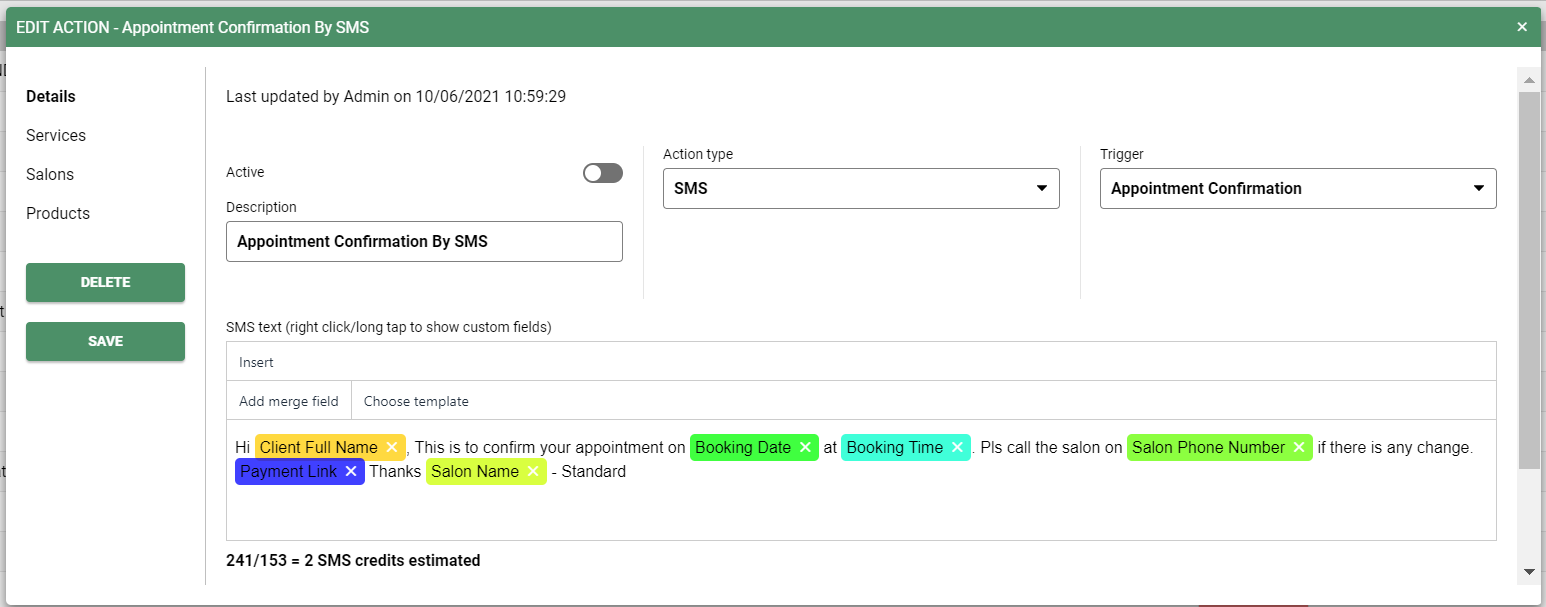
Right-click in the body of your message or select add merge field to add an automated merge field such as client name, or salon number.
You can select your reminders to only be sent out for certain salons if you are part of a group, simply select the Salons tab to toggle on your salon (if all salons are toggled off, messages will be sent to for all salons)
We would recommend a reminder is sent for all bookings, but if you prefer, you can select your reminders to only be sent out for certain services, simply select the Services tab on the left of your message details window and open the categories to toggle on selected services
Don't forget to Save your changes as you go.
Once you are happy with your message content select Save and if you wish to, you can send yourself a test message.
To send yourself a test message, scroll down below your message & you will need to select a test client from your client list, then add your mobile number in & press Send
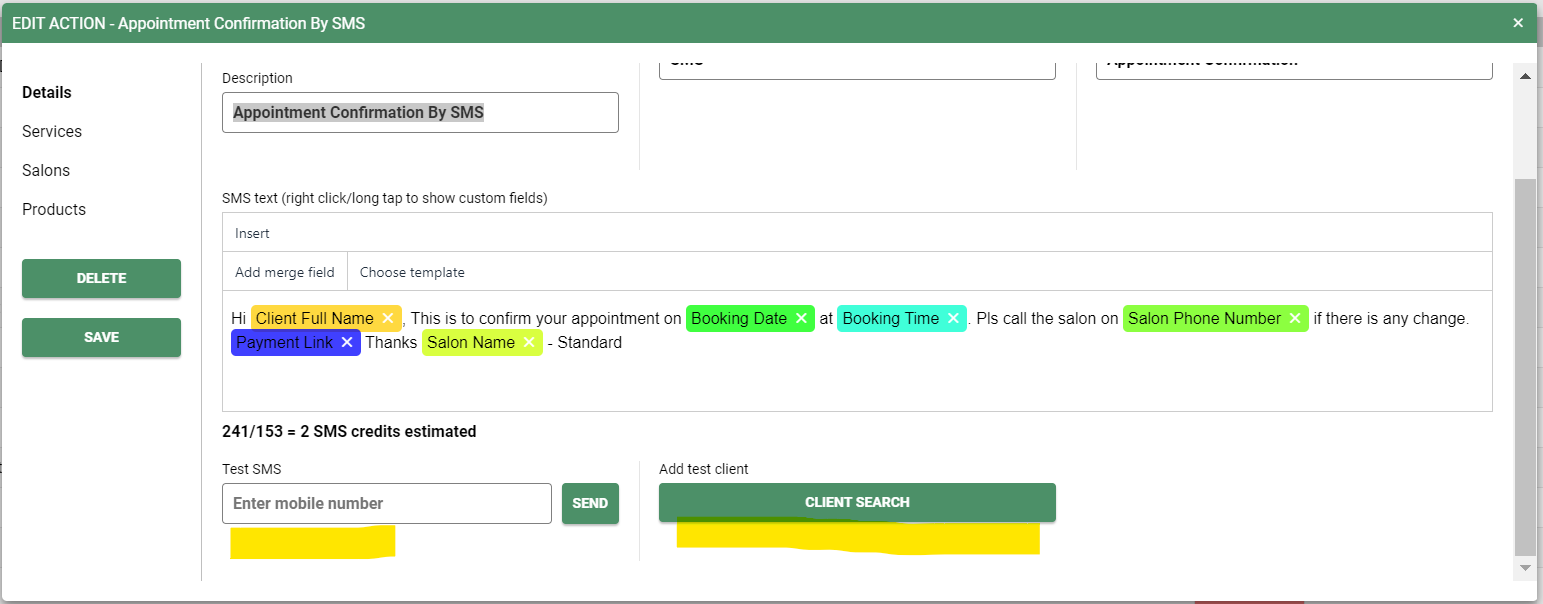
If you need to tweak your message after you receive your test message then you can edit & then re-save and re-test if you wish.
Test SMS messages are charged at your standard message rate.
Once you are happy with your message, switch the active toggle so it turns green and press the save button one final time.
Your appointment confirmation texts will now start going out after every appointment that is booked.
SMS appointment reminders are chargeable at your standard SMS rate.
How to set up an EMAIL appointment confirmation message
In the email message list, you will see a message titled Appointment Confirmation Email, it will be red if it isn't active.
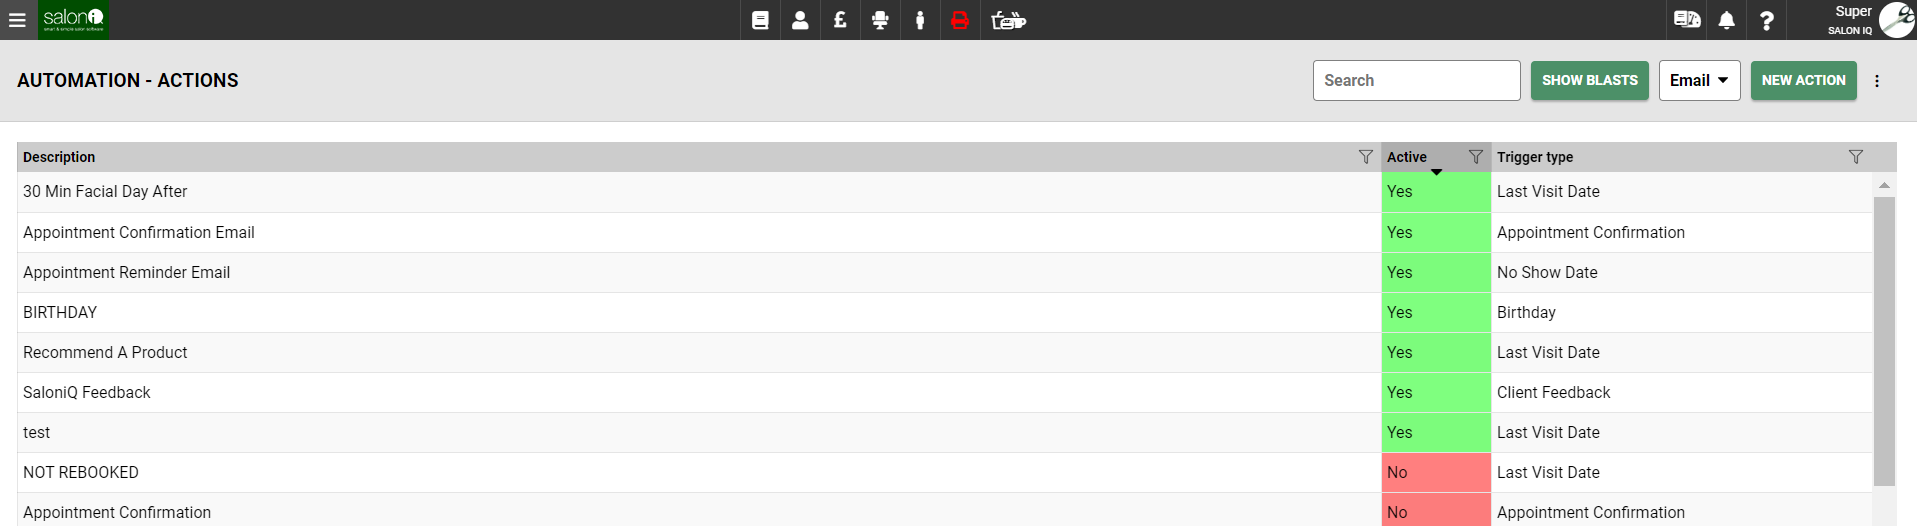
Click on the Appointment Confirmation Email name to open up the settings screen.
Once you have the details screen open you can create your message.
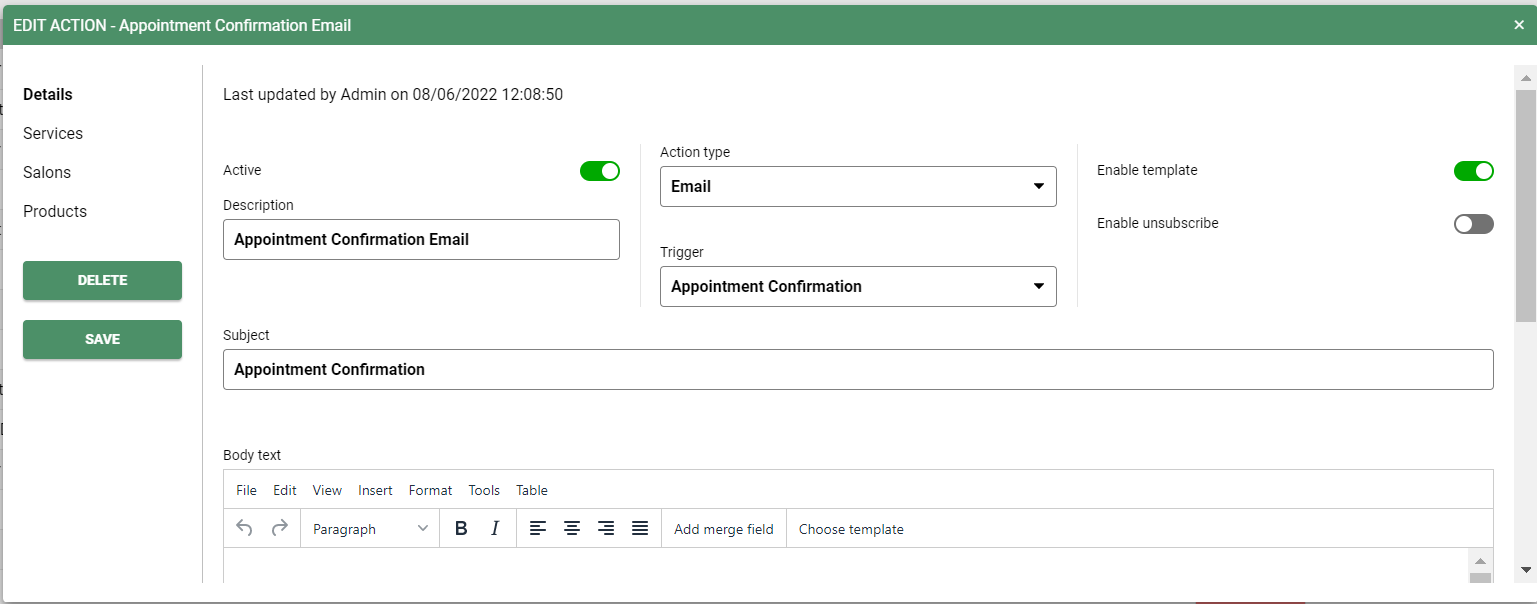
Firstly, you will see the top section has some pre-filled fields, please double check that they match the below:
Description - Appointment Confirmation Email
Action Type - SMS
Trigger - Appointment confirmation
Subject - Your email subject line (this will be sent to your clients)
Enable template - Enables you to use a saved template from your SalonIQ system
Enable unsubscribe - Give the option to your clients to unsubscribe from receiving further emails from you when this is enabled.
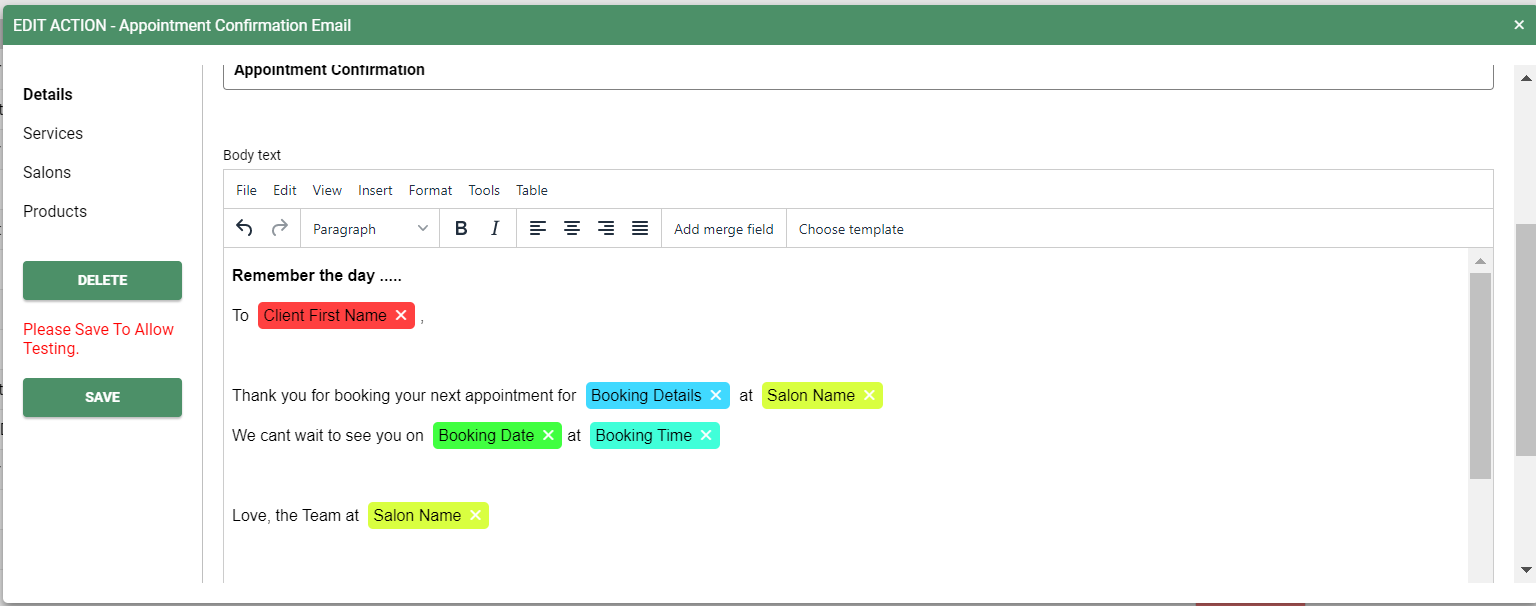
There will be an example message already pre-filled for you so you can keep this option, make tweaks or delete the wording and re-create your own message from scratch.
Right-click in the body of your message or select add merge field to add an automated merge field such as client name, or salon number.
Please remember, this is an email so it will look better if you set your message up over multiple lines and think about spacing, instead of a continuous line like you would do for an SMS message.
You can select your reminders to only be sent out for certain salons if you are part of a group, simply select the Salons tab to toggle on your salon (if all salons are toggled off, messages will be sent to for all salons)
We would recommend a reminder is sent for all bookings, but if you prefer, you can select your reminders to only be sent out for certain services, simply select the Services tab on the left of your message details window and open the categories to toggle on selected services
Don't forget to Save your changes as you go.
Once you are happy with your message content select Save and if you wish to, you can send yourself a test message.
To send yourself a test message, scroll down below your message and you will need to select a test client from your client list, then add your email address in and press Send
If you need to tweak your message after you receive your test message then you can edit & then re-save and re-test if you wish.
Automation email messages are FREE to send in both test and live mode.
Once you are happy with your message, switch the active toggle so it turns green and press the save button one final time.
Your appointment confirmation emails will now start going out after every appointment that is booked.
You can take your emails to the next level and import HTML code from a templated email in your email manager account. To do this, please view the following FAQ document: How to use HTML in the SalonIQ HUB